Design Inspiration & Ideas

Creating a wooden DIY Christmas tree offers a unique opportunity to personalize your holiday décor. The possibilities are endless, ranging from simple and rustic to modern and minimalist designs. The choice of design depends on your skill level, available materials, and desired aesthetic.
Five Unique Wooden DIY Christmas Tree Designs
The following designs showcase the versatility of wood in crafting Christmas trees, catering to various skill levels and design preferences.
- Simple Stacked Tree: This design uses varying sizes of wooden discs, stacked and glued together to form a cone shape. Materials: Wooden discs of varying diameters, wood glue, a base (e.g., a small wooden circle or square). The simplicity makes it a great beginner project.
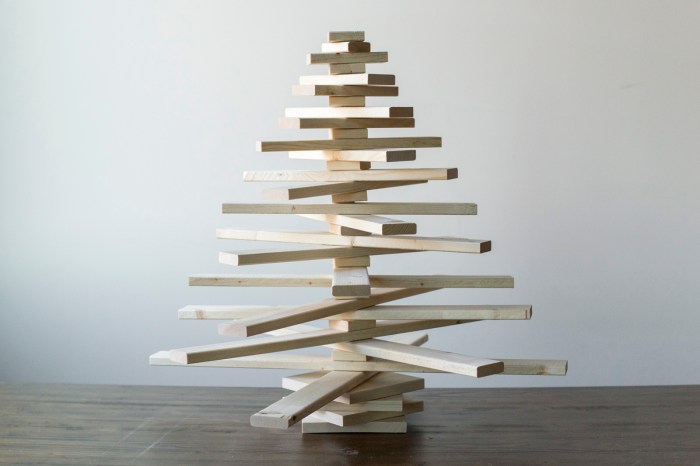
- Layered Triangle Tree: This design involves cutting and assembling triangular wooden pieces, layering them to create a three-dimensional tree. Materials: Wooden planks, saw, sandpaper, wood glue, stain or paint.
- Branch-Style Tree: This design uses individual wooden branches or dowels, arranged and glued to create a more natural, irregular tree shape. Materials: Wooden branches or dowels of varying lengths and thicknesses, wood glue, a base, possibly wire for support.
- Geometric Tree: This design uses geometrically shaped wooden pieces, such as squares or hexagons, arranged in a creative pattern to form a tree. Materials: Wooden squares or hexagons of varying sizes, wood glue, a base, potentially paint or stain for color.
- Ornate Wooden Tree: This intricate design uses smaller, intricately cut wooden pieces to create a detailed and decorative tree. Materials: Thin wooden sheets, intricate cutting tools (e.g., laser cutter or scroll saw), wood glue, small details (e.g., tiny wooden stars or beads).
Three Rustic-Style Wooden DIY Christmas Trees
Rustic designs emphasize natural wood tones and textures, often incorporating imperfections to enhance their charm.
- Reclaimed Wood Tree: Using reclaimed wood, such as old pallets or barn wood, gives the tree a unique character and a vintage feel. The construction technique involves cutting and shaping the wood into a tree form, leaving the natural texture and imperfections visible. The aesthetic appeal lies in the wood’s history and uneven texture.
- Driftwood Tree: Gathering driftwood pieces and assembling them into a tree shape creates a coastal, rustic look. The irregular shapes of the driftwood add to the tree’s unique character. The construction requires careful selection and arrangement of the driftwood pieces, using strong adhesive to secure them.
- Branch-and-Twine Tree: This design uses natural branches, wrapped with twine or jute rope, to create a rustic, textured tree. The construction is relatively simple, involving gluing the branches to a base and wrapping them with twine. The aesthetic appeal is the combination of natural elements and the textured twine.
Miniature Tabletop Wooden DIY Christmas Tree
This design is perfect for smaller spaces or as a charming addition to a shelf.Materials List:
- Small wooden dowel (approximately 6 inches tall)
- Small wooden star or circle for the treetop
- Small wooden beads or sequins for ornaments
- Wood glue
- Small wooden base (e.g., a small square or circle of wood)
- Optional: Acrylic paint or stain
Assembly: Glue the star or circle to the top of the dowel. Glue small beads or sequins onto the dowel to represent ornaments. Glue the dowel to the wooden base. Optionally, paint or stain the wood before assembly.
Modern Minimalist Wooden DIY Christmas Tree
This design prioritizes clean lines and simple forms.Visual Representation: Imagine a sleek, triangular shape formed from three thin, precisely cut wooden slats. The slats are stained a dark, rich brown and are joined seamlessly at the top to form a sharp point. The base is a simple, unadorned square of the same dark wood. The overall effect is one of sophisticated simplicity.
Unique features include the sharp angles and the lack of any additional ornamentation; the beauty lies in the wood’s natural grain and the precision of the cuts. Materials: Three long, thin wooden slats, a square wooden base, wood glue, dark wood stain, precise cutting tools.
Materials & Tools

Creating a stunning wooden DIY Christmas tree requires careful consideration of both the materials and tools you’ll be using. The choice of wood significantly impacts the final aesthetic and the ease of construction, while the right tools ensure a smooth and efficient process. This section details the essential aspects of material selection and tool acquisition for your project.
Suitable Wood Types
Several wood types are well-suited for crafting a Christmas tree, each offering unique characteristics. Balsa wood, for instance, is incredibly lightweight and easy to carve, making it ideal for intricate designs and smaller trees. Its soft nature, however, means it’s more susceptible to damage. Pine, on the other hand, is readily available, relatively inexpensive, and offers a pleasing natural aesthetic.
Its slightly harder texture requires more effort during cutting and shaping but results in a more robust and durable tree. Hardwoods like birch or maple offer superior strength and a refined look, but are more challenging to work with and considerably more expensive. The choice ultimately depends on your skill level, budget, and desired aesthetic.
Essential Tools
The tools required for building a wooden Christmas tree can be categorized by function. Cutting tools include a saw (hand saw or jigsaw for precise cuts), a wood rasp for smoothing rough edges, and sandpaper for achieving a fine finish. Measuring and marking tools are crucial for accuracy, including a ruler, measuring tape, pencil, and possibly a square for ensuring right angles.
Crafting a wooden DIY Christmas tree offers a unique and sustainable festive decoration. To complement your handmade tree, consider creating festive attire with the help of some inspiration from this guide on christmas character costumes diy ; perhaps a miniature Santa or elf to place beneath your creation. The resulting combination of handcrafted tree and charming costumes will truly personalize your holiday display.
Assembly tools depend on your chosen construction method; this could include wood glue, clamps, screws, and a screwdriver. Finally, finishing tools might include paintbrushes, stain, varnish, or sealant to protect and enhance the tree’s appearance.
Pre-cut versus Self-cut Wooden Pieces
Using pre-cut wooden pieces offers significant advantages in terms of time and ease of construction. Pre-cut kits often provide precisely sized components, simplifying the assembly process and reducing the need for intricate cutting and shaping. However, this convenience comes at a higher cost. Cutting your own wood allows for greater customization and design flexibility, potentially resulting in a more unique and personalized tree.
This approach, however, demands more skill and time, requiring precise measurements and careful cutting to avoid errors.
Cost-Effectiveness and Availability of Wood Types
The following table compares the cost-effectiveness and availability of different wood types commonly used in DIY projects:
| Wood Type | Cost (per board foot, approximate) | Availability | Workability |
|---|---|---|---|
| Balsa | $2-5 | High | Very Easy |
| Pine | $5-10 | High | Easy |
| Birch | $10-15 | Medium | Moderate |
| Maple | $15-20 | Medium | Moderate |
Note: Prices are approximate and can vary depending on location and supplier. Availability refers to ease of sourcing from local lumber yards or online retailers. Workability reflects the ease of cutting, shaping, and sanding the wood.
Construction Techniques & Methods

Building your wooden Christmas tree offers a rewarding crafting experience. The following sections detail various construction methods, base creation techniques, and decorative approaches, guiding you through the process from initial design to final embellishment. Remember to always prioritize safety and use appropriate tools and protective gear.
Three Distinct Assembly Methods
Constructing a wooden Christmas tree can be approached in several ways, each offering unique aesthetic and structural characteristics. The choice depends on your skill level, available materials, and desired final look.
- Method 1: Simple Stacking: This method involves stacking progressively smaller wooden pieces, creating a layered tree shape. Imagine a series of circular or square wooden slices, decreasing in diameter or side length with each layer. These are then carefully stacked and secured using wood glue and small dowels or screws. The glue ensures adhesion, while the dowels provide additional structural support, preventing the layers from shifting.
A visual representation would show a series of perfectly centered wooden discs, decreasing in size, stacked to form a conical shape. The dowels would be visible as small pins connecting the center of each layer.
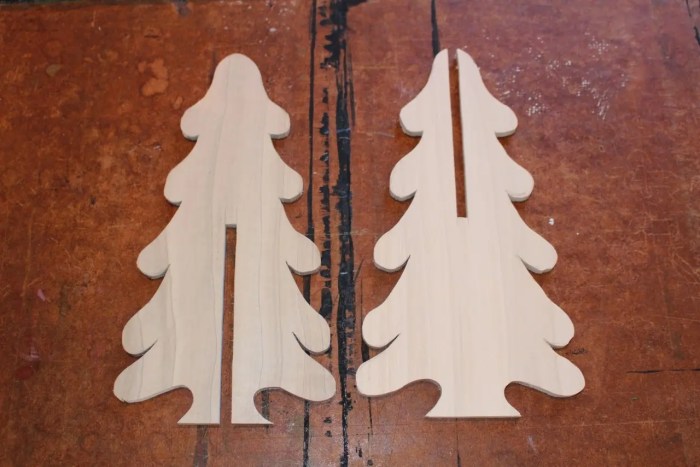
- Method 2: Interlocking Design: This approach uses pieces of wood cut with interlocking shapes, like puzzle pieces. Each piece is carefully shaped to fit snugly into the next, creating a strong and visually interesting structure. This method requires more precise cutting and planning, but results in a more robust and aesthetically pleasing tree. The image would show a series of wooden pieces, each with a unique, precisely cut shape that interlocks with its neighbor, forming a cohesive and stable tree.
No additional glue or fasteners might be needed depending on the precision of the cuts.
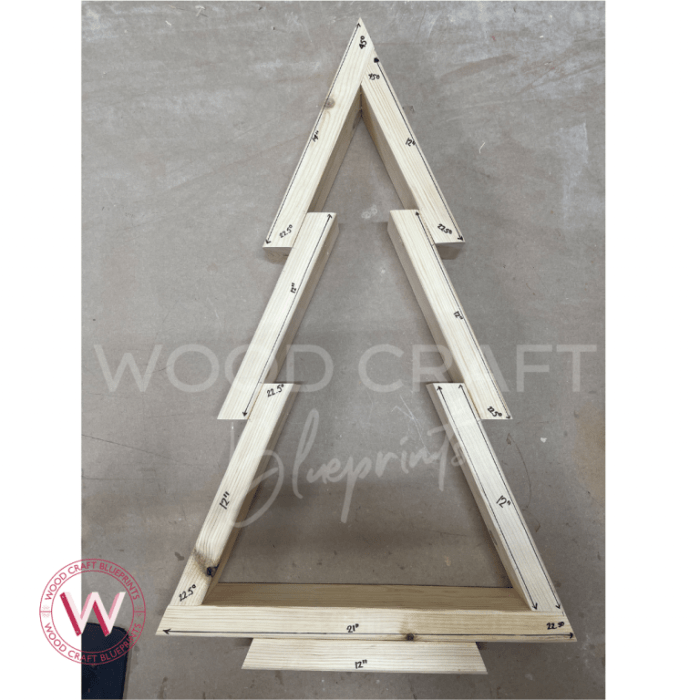
- Method 3: Frame and Panel Construction: This method involves creating a frame from larger pieces of wood and then attaching smaller wooden panels or slats to form the tree’s shape. The frame provides a sturdy base, while the panels create the visual appeal. This technique is ideal for creating larger or more complex tree designs. Imagine a triangular wooden frame acting as the skeleton of the tree, with thin wooden slats attached to the frame, resembling branches.
The image would show a strong triangular base, with thinner wooden slats or panels attached, giving the appearance of a full, branched tree.
Creating a Stable Base
A sturdy base is crucial for a freestanding wooden Christmas tree. Several methods can achieve this.
- Method 1: Wide Base: A simple and effective method is to create a wide, flat base from a single piece of wood or several smaller pieces joined together. The larger surface area provides excellent stability, especially for heavier trees. The visual would show a large, flat wooden base, significantly wider than the tree’s trunk, providing a broad, stable support. The tree would be firmly attached to the base.
- Method 2: Triangular Base: A triangular base offers superior stability compared to a square or rectangular one. Constructing a triangular base from three pieces of wood, securely joined, creates a strong and visually appealing foundation. The image would display a sturdy triangular base, with each side firmly joined, offering excellent support for the tree, even in uneven spaces.
Decorating Techniques: Natural vs. Painted
Two primary approaches exist for decorating your wooden Christmas tree: using natural elements or paint and embellishments.
- Natural Elements: This method emphasizes the natural beauty of wood by using natural materials like pine cones, dried flowers, berries, and small twigs for decoration. The aesthetic is rustic and charming. The image would show a wooden tree adorned with pine cones, small dried flowers, and berries, creating a natural and rustic look. The wood grain is clearly visible, and the decorations enhance the natural aesthetic.
- Paint and Embellishments: This approach allows for greater creative freedom. The tree can be painted in various colors and decorated with glitter, ribbons, small ornaments, or other embellishments. The possibilities are endless. The image would depict a vibrantly painted wooden tree, perhaps in a festive color, adorned with glitter, small ornaments, and ribbons, creating a bright and decorative look.
The paint would be smooth and evenly applied, and the embellishments would be carefully placed.
Creating a Layered Wooden Christmas Tree
Building a layered tree involves using progressively smaller wooden pieces to create a tiered structure.
The process begins with selecting appropriately sized wooden pieces. Precise measurements are crucial for a balanced and visually appealing tree. Each layer should be slightly smaller than the one below, creating a conical shape. The pieces can be circular, square, or any other desired shape. Once the pieces are cut, they are carefully stacked and secured using wood glue and small dowels or screws, ensuring a strong and stable structure.
The final step involves sanding and finishing the tree to achieve the desired look, perhaps adding a protective sealant.
Q&A: Wooden Diy Christmas Tree
What type of wood glue is best for a wooden Christmas tree?
Wood glue specifically designed for interior use is recommended. Look for a strong, water-resistant formula.
How do I prevent the wood from splintering during construction?
Sand all wooden pieces thoroughly before assembly. Use fine-grit sandpaper for a smooth finish.
Can I use a different type of light than LEDs?
While LEDs are safest, you can use other low-voltage lights, but ensure they are rated for indoor use and properly insulated to prevent fire hazards.
How long does it typically take to build a wooden DIY Christmas tree?
The time required varies greatly depending on the complexity of the design and your experience level. Simple designs can take a few hours, while more intricate projects may take several days.
